Project omschrijving
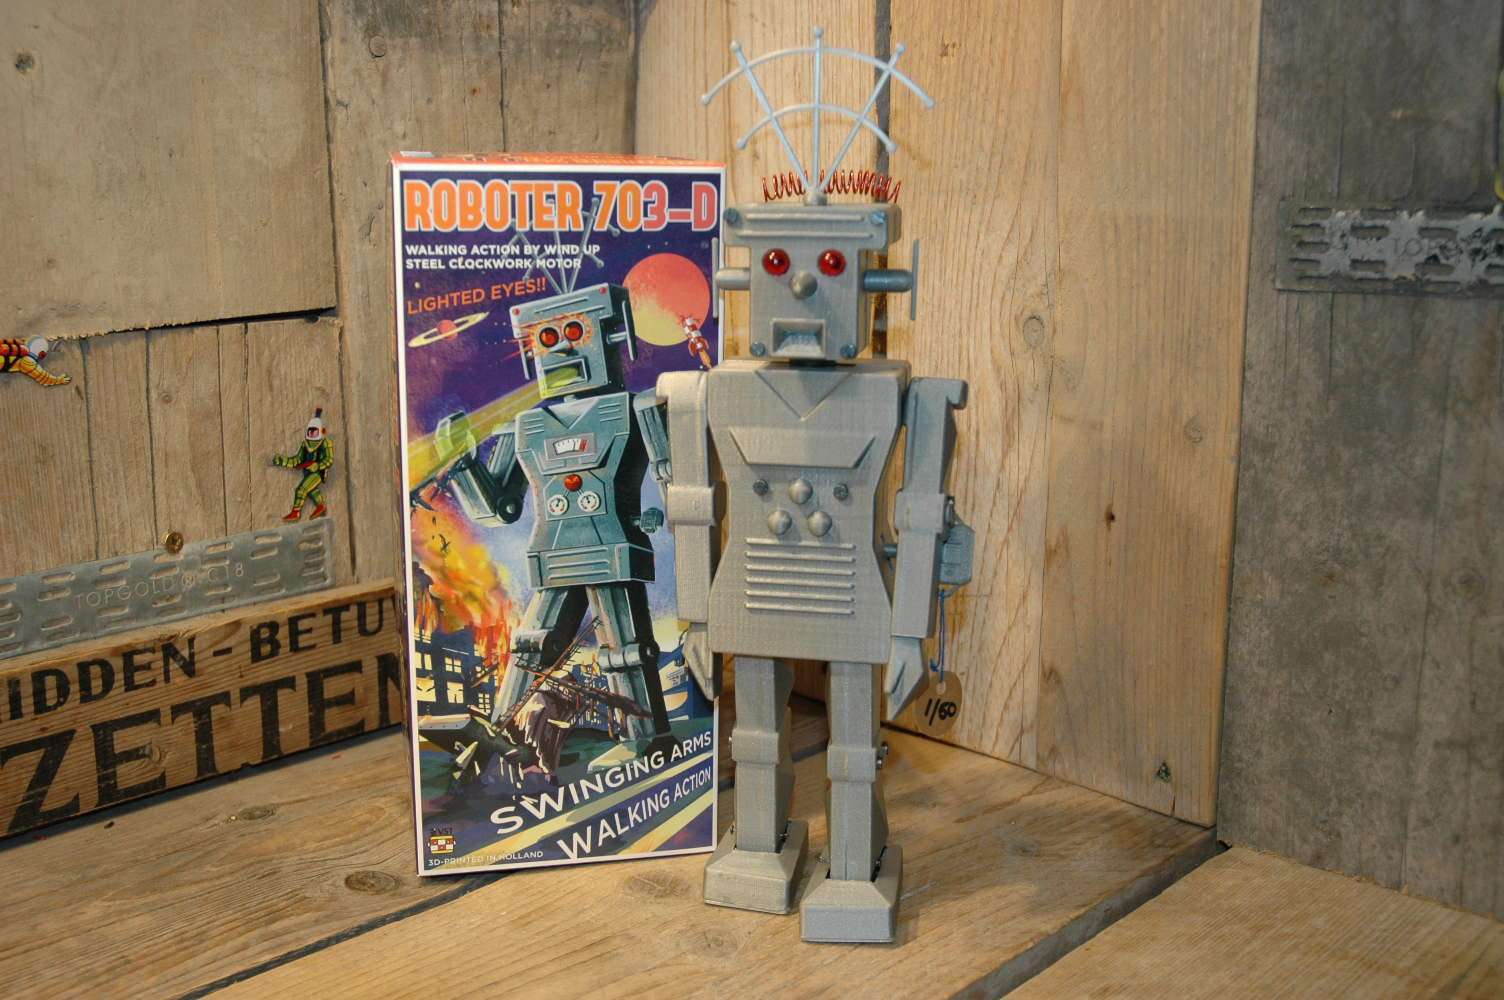

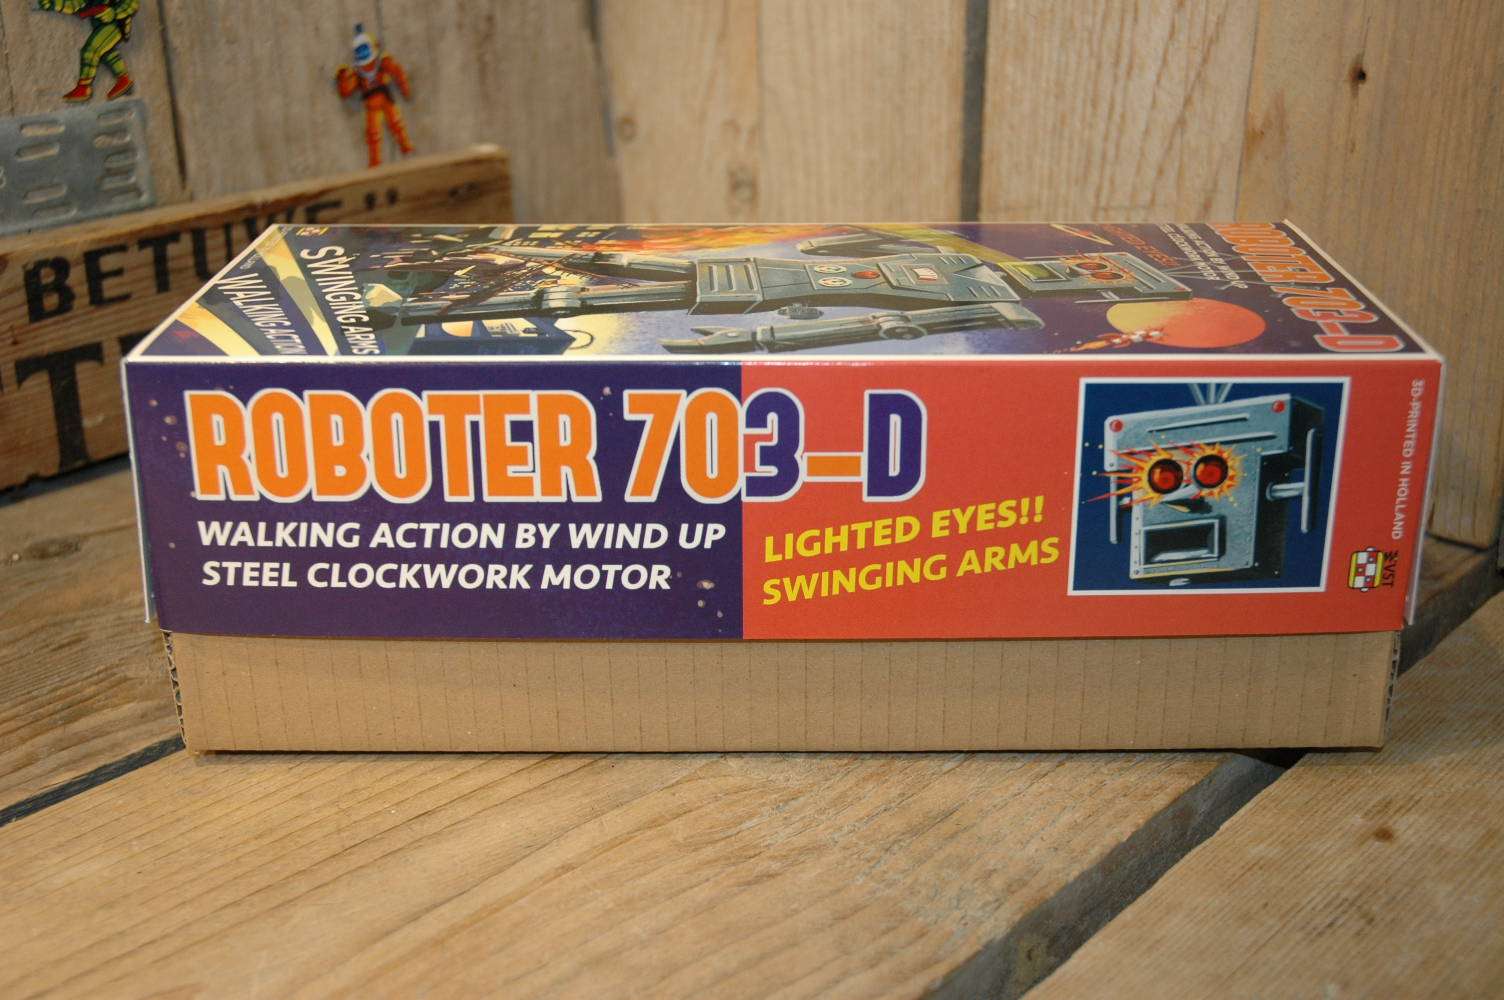
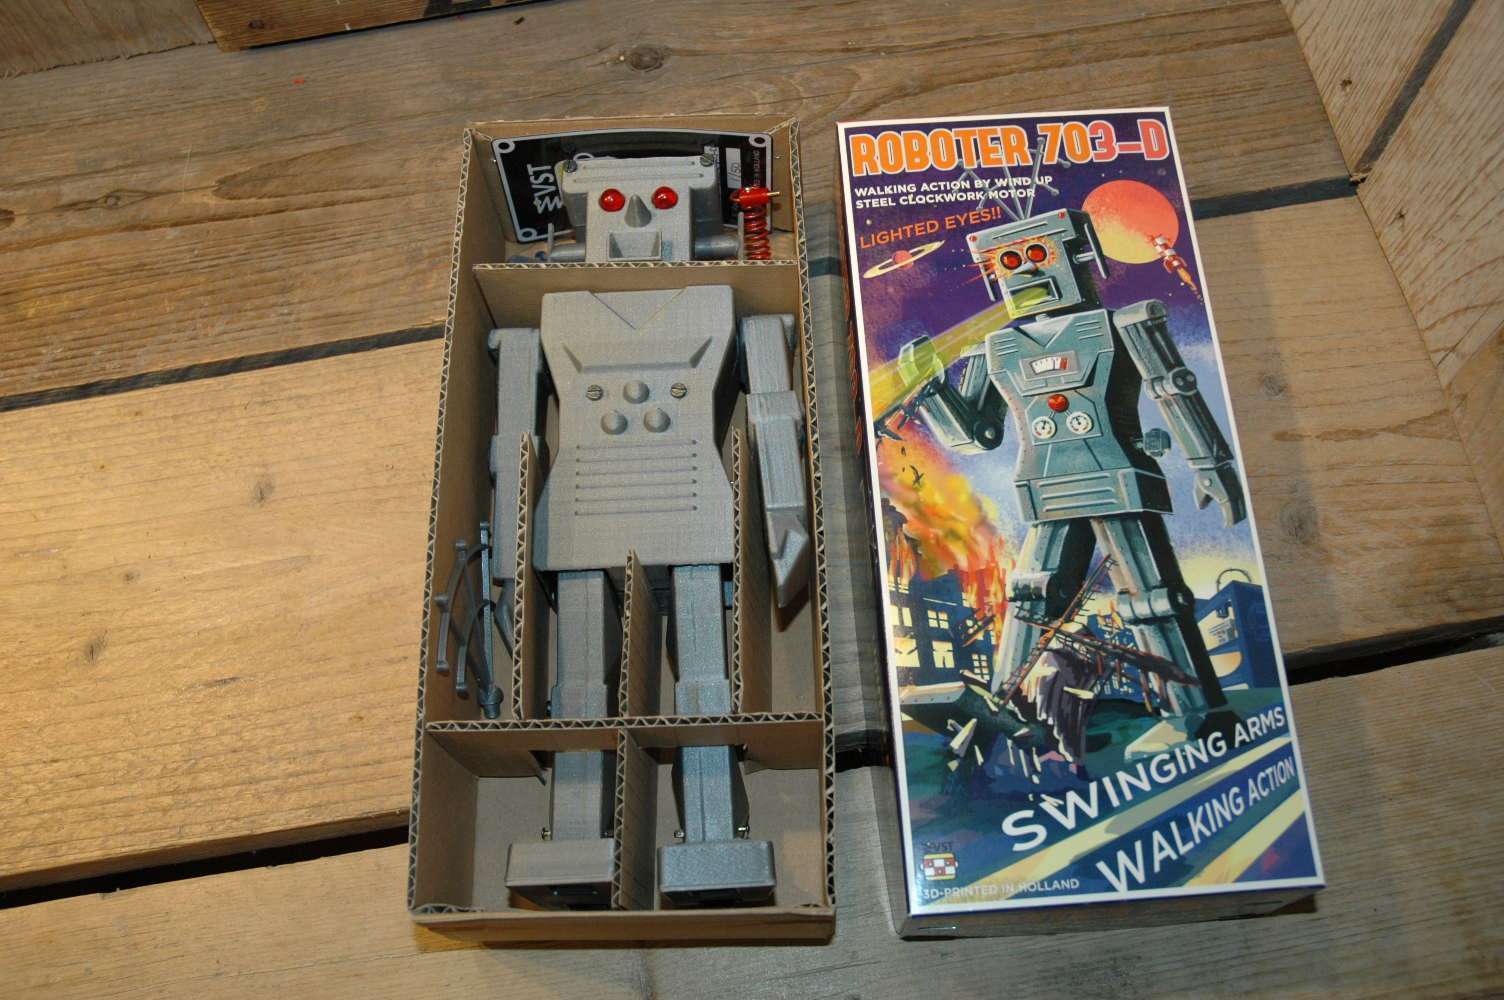
VST – Roboter 703-D
It must have been some years ago when i wanted to start making robots with 3D technology but for several reasons the technique was not good enough for my standards… When i started to experiment last year with 3D scanning and printing there was ONE particular robot i had in mind to create… Roboter 700, made in Germany somewhere in the late fifties…
Roboter 700 is one of the rarest and most scarce robots that was ever made and surprisingly the robot was not made in Japan but in Western-Germany. Roboter 700 is made out of plastic parts that can be put together by screws and is powered with a clockwork mechanism with walking action, moving arms, movable head and flashing / blinking eyes.
Estimated is that only 10 examples of Roboter 700 were ever build up. The robot was never taken into production. There was a box made for this robot and they were used to store other parts of dolls and thermometers afterwards when the project busted.
All the information about Roboter 700 has been wonderful described into the finest details by Dirk on his website. You can read the complete history about Roboter 700. HERE
Loaded with all this information I started an ambitious project called:
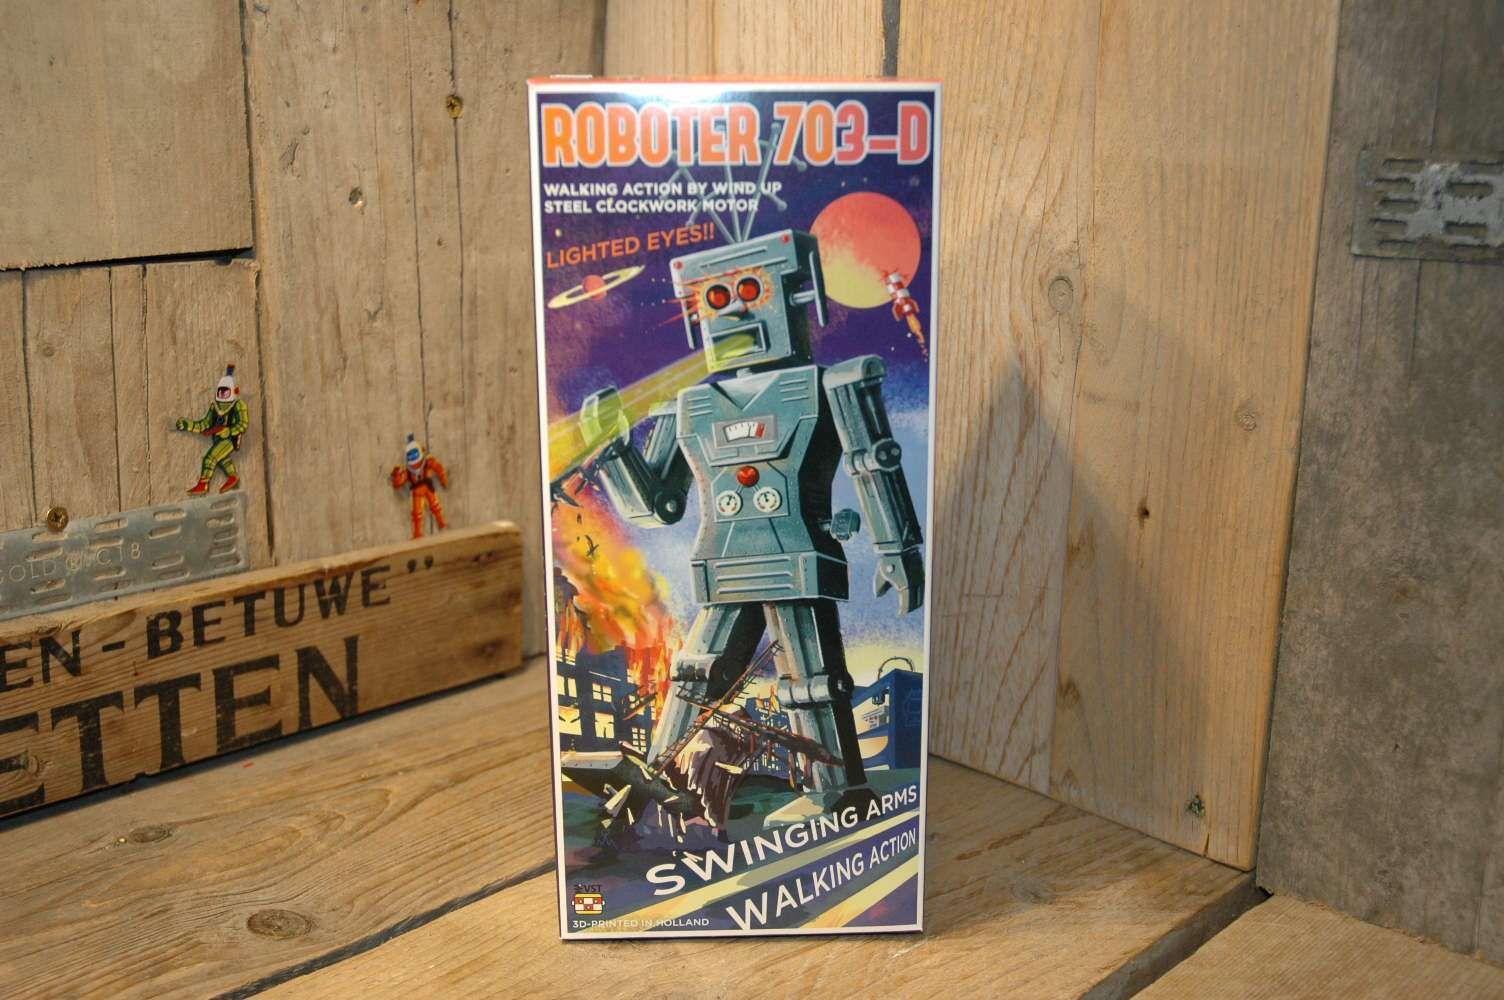
Roboter 703-D
In this project I wanted to create a high-end 3D printed copy of this legendary robot with all the exact details, measures,mechanism and actions.
I bumped into several problems but the major one was how on earth I was able to come even close to an original robot 700 and second, the biggest challenge … who would allow me to have the robot in my robot caves for several weeks, let me take the robot fully apart to capture all its ” bits and bytes…” in 3D.
I talked with Xris about this project some time ago and he allowed me to pick up his original roboter 700 and put it on the “3D Operating Table”.
Taking this “fragile” robot apart was quite a delicate job and I realized I was one of the few on this planet who had this robot on my ” Operating table”… how cool to see this legendary robot from the inside, the complex windup mechanism and the special way this robot is able to walk.
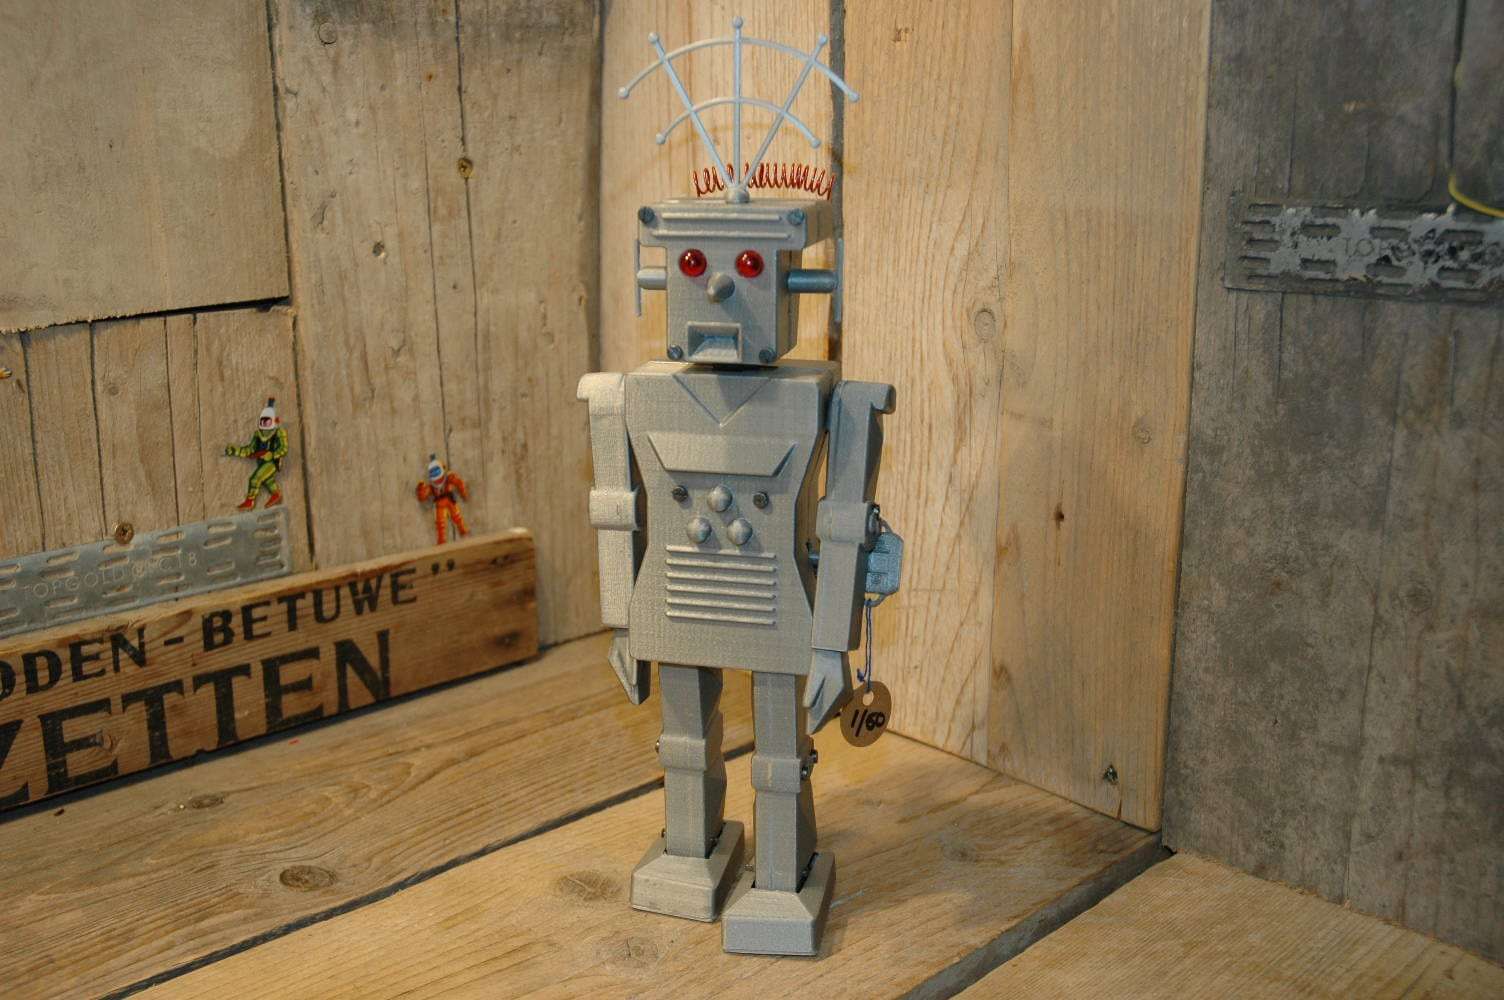
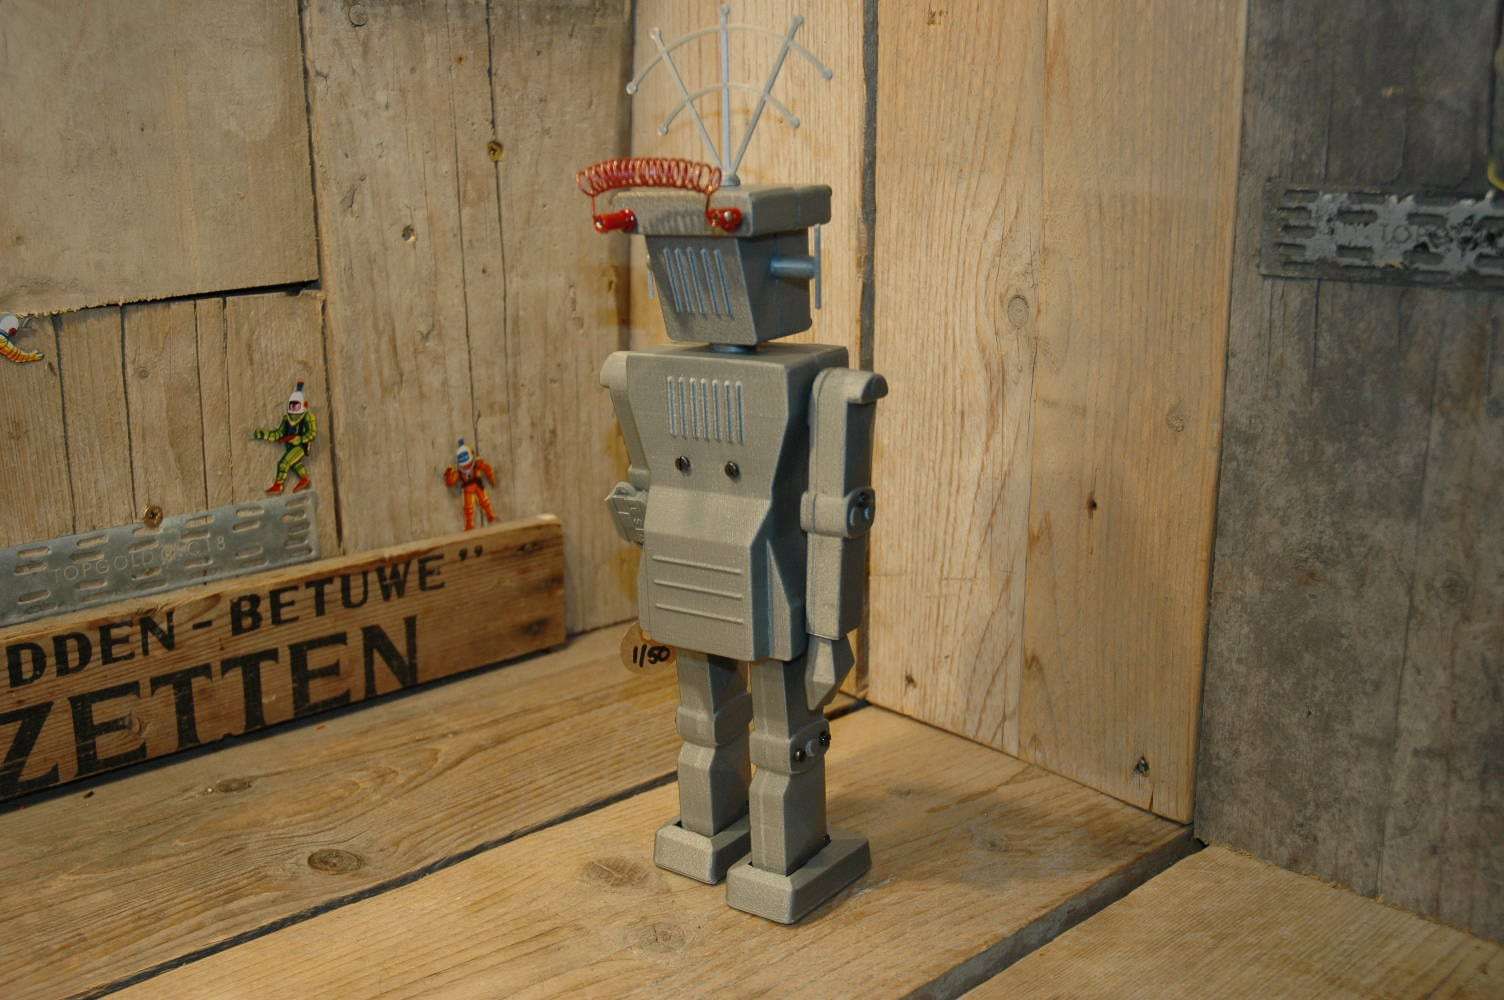
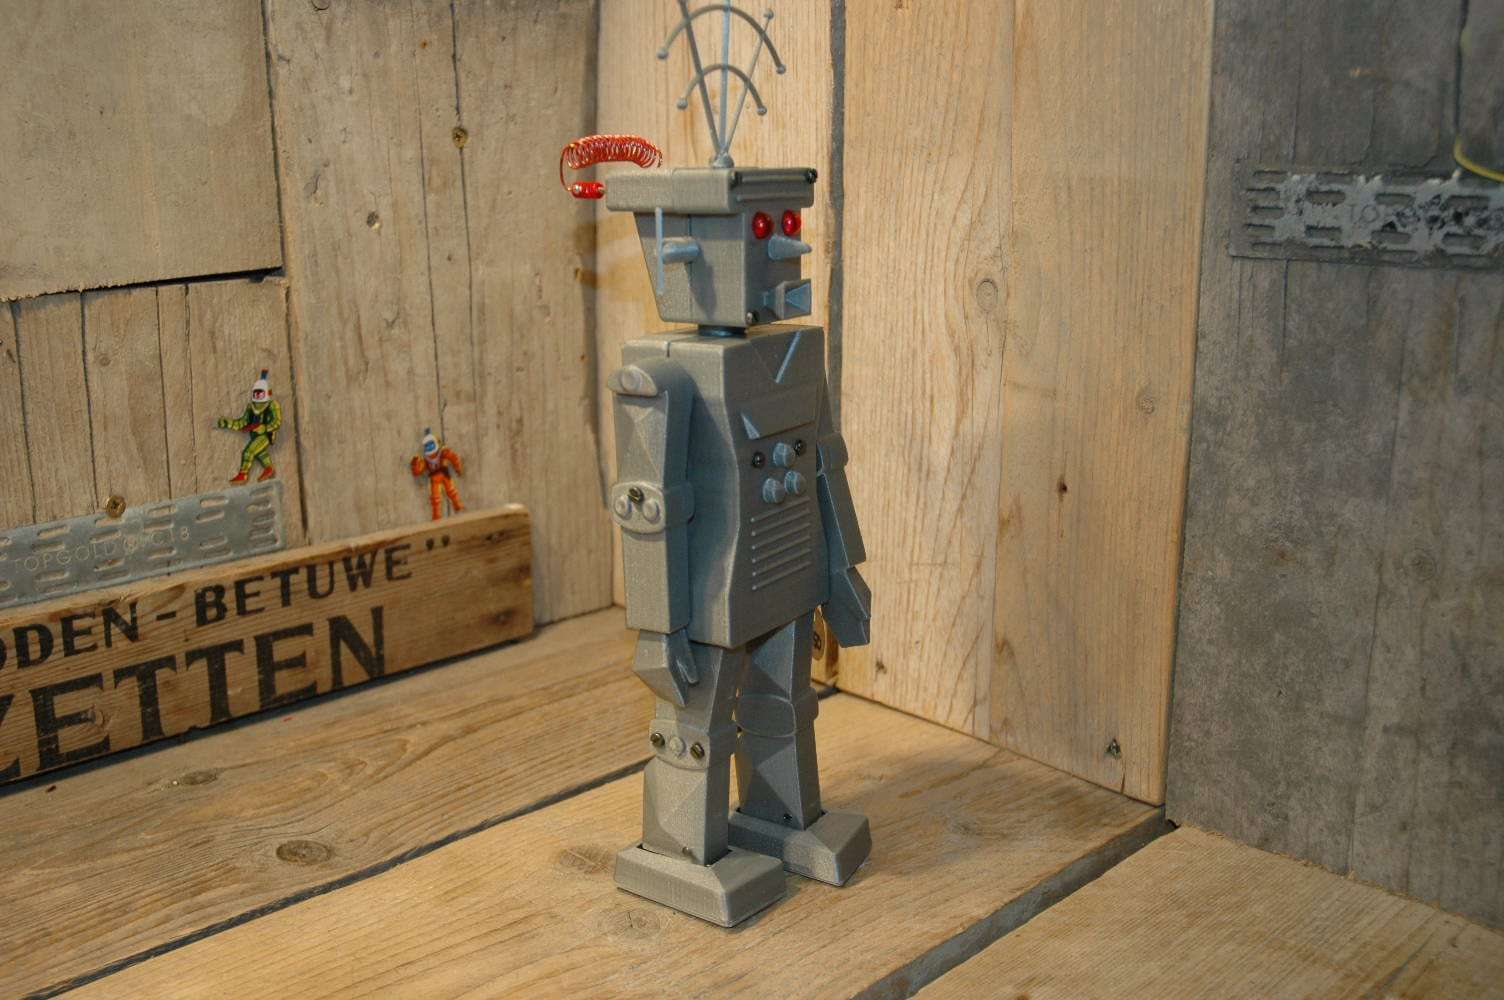
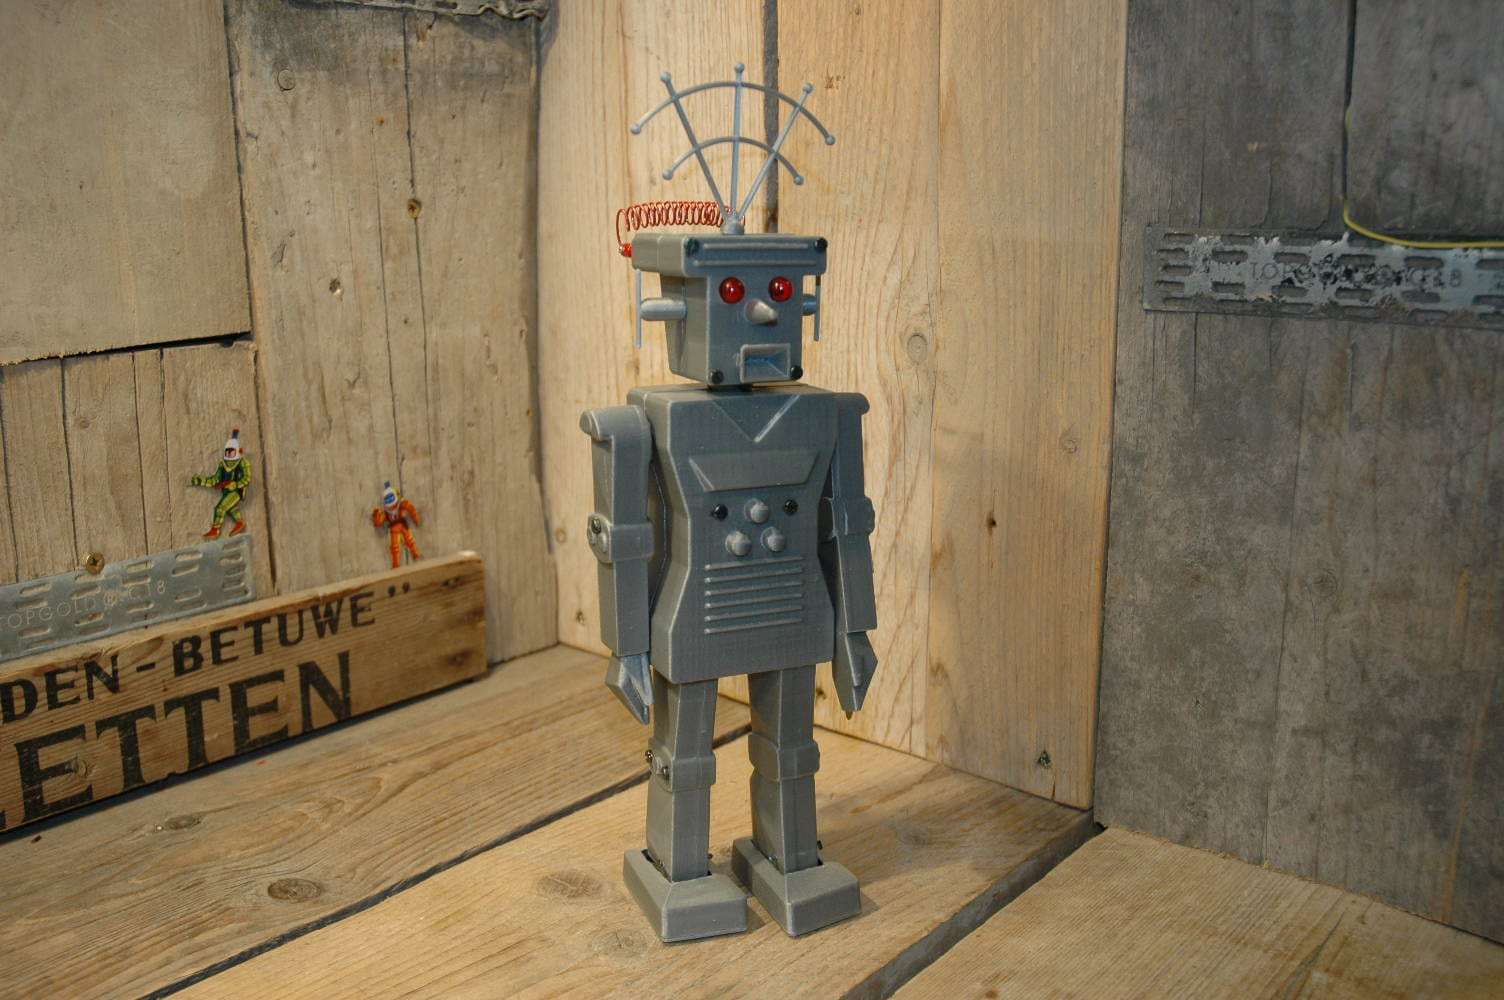
The original robot 700 is equipped with a windup mechanism that allows the robot to walk ( more or less, the original roboter 700 is not the best walking robot by the way) swinging arms, a movable head and lighted blinking eyes ( More about those blinking eyes later … ), just like the original robot. Further I wanted to create this robot as an exact copy, made to the finest details possible so that means i have to look close to every part, screw, bulb, wire etc etc.. all must be the same as the original robot.
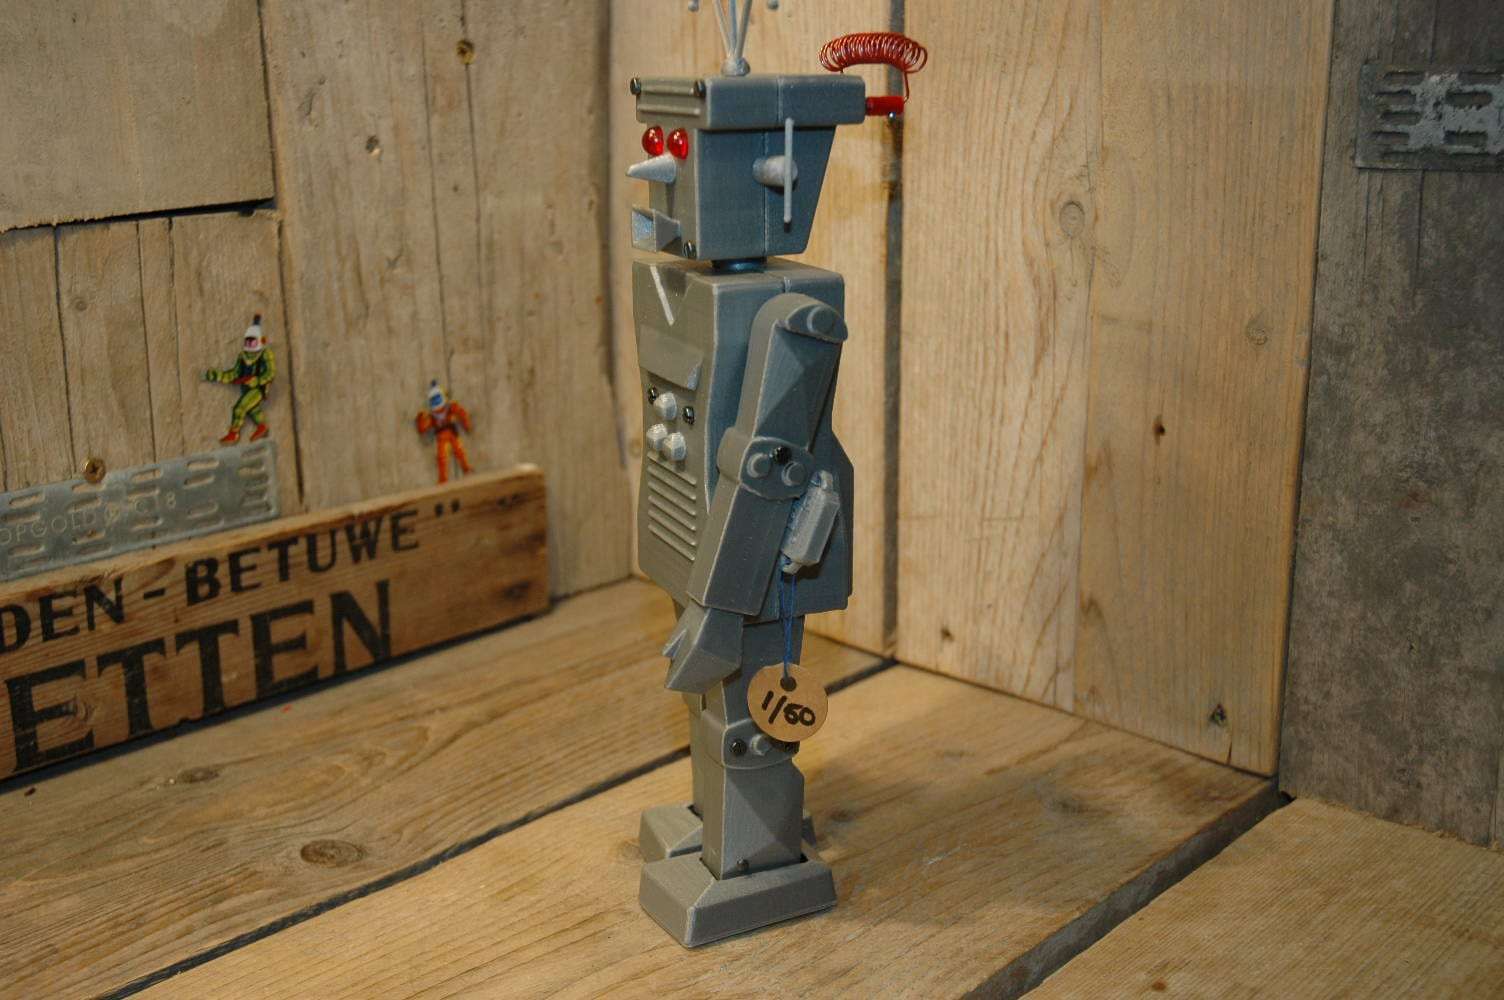
I started with the head. The head is an exact scan made of the original 700 head. The ears, antenna and neckpiece are separate parts and the head is made out of a front and backside that is hold together with screws. The antenna, neckpiece and ears are drawn in 3D as they were nearly impossible to capture with the scanning techniques.
Inside the head are 2 vintage lightbulbs ( They came from the legacy of Mr Shinji Miyazawa ) and I have about 85 of these in stock. These bulbs are not made anymore and impossible to find because of their rare small shape. These fit perfectly in the holes of the Roboter front part of the head. The original 700 has blinking eyes and this blinking action is done by a bi-metal inside the bulb. The vintage bulbs i have are exact the same size but lack the bi-metal so I had to think about a way to have them blink in 703-D. This really looked like an easy job but costed me a week to accomplish and 2 sleepless nights.
The problem with this whole project is this: Because i wanted to make an exact copy of roboter 700 I restricted myself in a big way. For the eyes: The vintage bulbs are 2.5 volts, which means that they need at least 3 volts to light up properly BUT… there is NO room for 2×1.5 volt batteries in the head and a 3 volt battery is not powerful enough to light up 2 bulbs. Also the weight of the batteries in the head would be to much, every single gram counts and makes the robot more unstable.
Finally i found a 3 volt very small battery that I could place in the head but… that still did not made the bulbs blink.
Besides using a bi-metal for this, you need electronics to have the eyes blink but… all i could found runs on 9 volts… so not an option because of the weight of the battery. after a 2 days search I found new 3.5 volt bi-metal bulbs and ordered a dozen of them..but when they arrived i saw what i overlooked: to big to fit into the holes for the eyes 🙁 I contacted a local electronic shop and asked them a simple question: ” I have 2 bulbs and I want them to blink… how to do this….”
the answer was quick and simple… ” its not possible on 3 volts ”
Still I could not let it go and found a solution on 4.5 volts in the form of a small SMD card ( size of a poststamp) that was able to let 2 bulbs blink. I bought some of them and hoped it would work on the 3 volt battery I had… nopes again it did not work. I searched again for a solution and saw I guess, over 150 different batteries in all kind of forms and than found a 8 gramm 6.2 volt battery at last. Enough to feed the smd card.
But.. with a 6,2 volt battery only comes little current ( 170 mAH ) and again it was not enough to let the smd card power both bulbs… only one blinked… damned…
I tested with 2 x 6.2 volt batteries and blew up one bulb. ( of course because i feeded 12 volts into a 2.5 volt bulb) …. but this was my luck.
When I blew up one bulb, the other one blinked fine on the 6.2 volt battery on the smd card. Later that day i had the solution: what if I use 2 of these smd cards and let them power each a bulb… and yes that worked.. So to make a robot with 2 blinking bulbs I needed 2 smd cards and a 6,2 volt battery of 8 gramm that is placed in the center body of the robot… it worked !
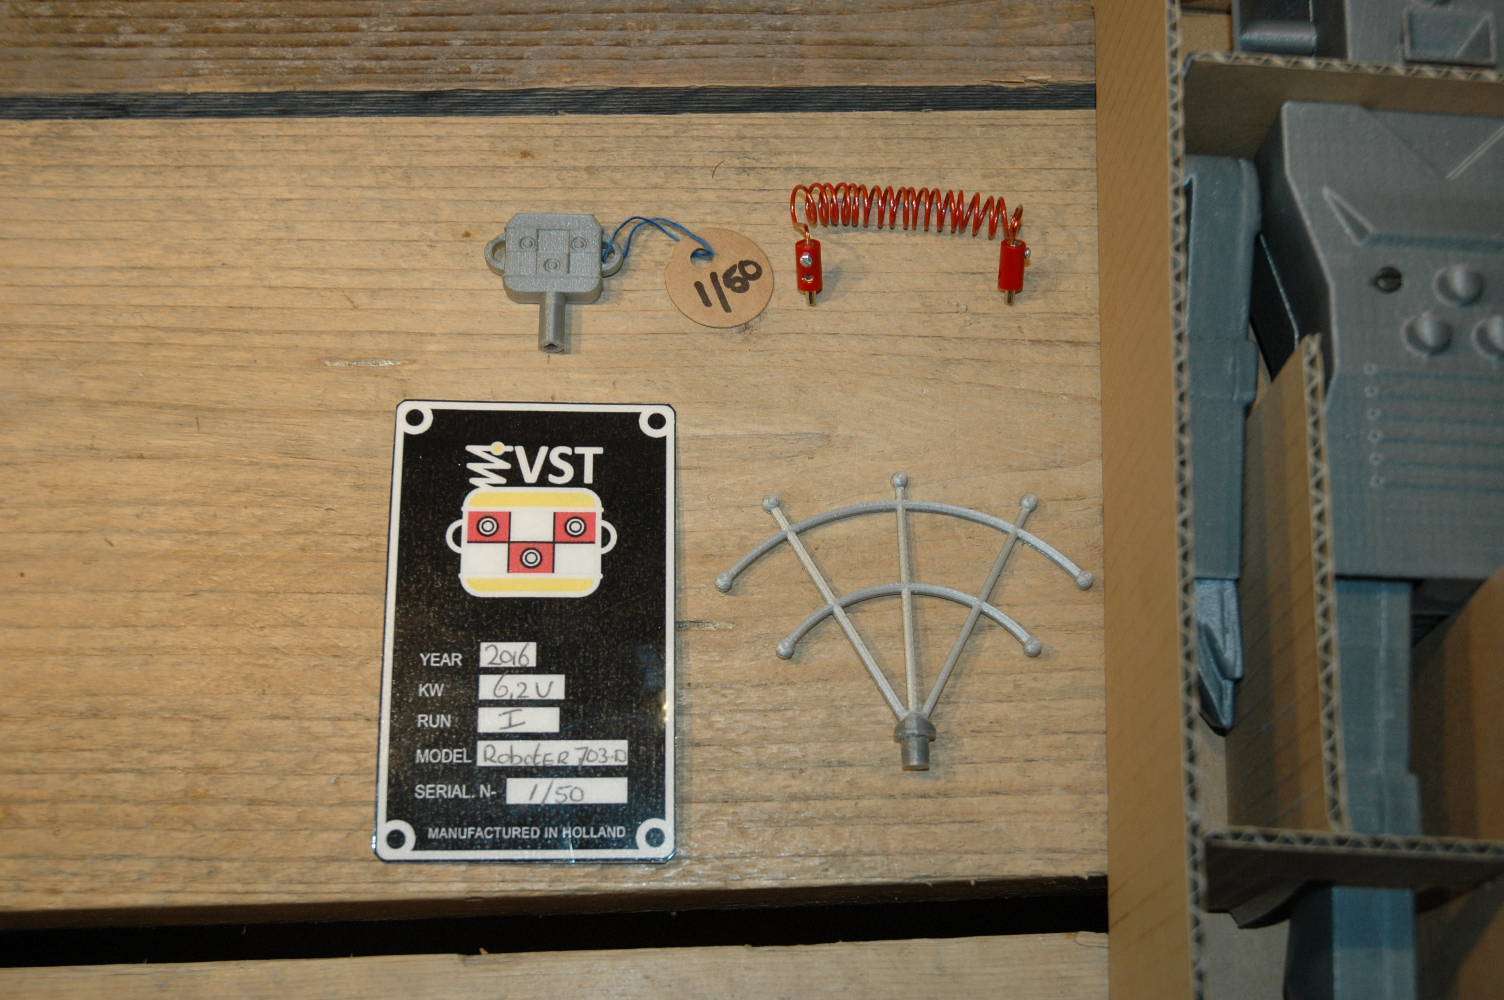
The “on / off” switch is the red coil at the back of the head. two socalled “banana plugs” can be inserted in the head to make the connection for the eyes to light up and blink. I found the banana plugs in germany and they are exactly the same plugs as used in the original 700. ( marklin plugs )
In the weeks to follow I was able to capture the rest of the body parts, the legs and feet and started to think about a mechanism for this robot.
I choose the difficult ( and Gernot stated: ” the impossible way ” to get the robot going: CLOCKWORK MECHANISM…!
I guess Gernot was right and it was nearly impossible to create. It would have been much easier to use some modern electronics and have the roboter powered and walking by a battery powered motor with a remote control just like Grandpa did in his project for example. I choose the hard way and if i knew THEN what i had to accomplish, I am sure I would have chosen an easier battery powered option.
First I “destroyed” a few windup robots from which I think the clockwork could be used to fit into the roboter body. but none of them could be used, simply because they were to big and I was not able to cut off enough material to get it fit. I tried also a pinwalking option but no luck there either. After destroying some serious robots I was about to give up the clockwork idea.
At that time I was also working on the gosstavo project and my eye fell on a stripped mechanism of a sparky robot, who`s mechanism is used for Gosstavo…. hmmm what if… what if….
I took a new sparky and stripped all i could to end up with a bare clockwork… and yes… as if it was made for the roboter !!
I had to change 2 gears, cut of some material of the mechanism and slow down the speed of the clockwork. It did fit PERFECTLY.
Not even sure if the mechanism was able to power this relative big robot but that was for a later concern.
I build up a first prototype with this mechanism but ran into a major problem and I think the designers of the original robot had the same problem: the balance of this robot. The relative heavy head makes the robot sort of “top heavy” and the total footbase is relative small, to small !
When I had Xris his original roboter 700 in my workshop, i tested it of course to see how it walked: VERY slow and very unstabil… the robot does not need to much to fall forwards or backwards.
The same problem I ran into with the first prototype. I build a mechanism to attach the legs to the mechanism and used the wheelbase from the sparky that i build into the 3D printed feet. In fact, the first prototype was better than expected. the legs moved and the robot was even able to do some steps but… was VERY unstable… in fact, it could not walk by himself, it fell over forwards or backwards. Not only the small wheelbase and wheels from the sparky robot caused this but also the driving rod inside the legs had to be exact to the tenth of a mm… pfffieuw…
I decided to build up a second prototype and first worked on the exact measurements of the legs, the attached mechanism to attach it to the clockwork and the driving rod inside the legs. I found that only 0,2 MM in the length of this internal rod, caused the robot to fall forward or backwards..
I made 6 different rods to test and found the correct setting to have the robot stand up exactly at 90 degrees. Now I had to find a solution for the feet, the internal mechanism there and the wheelbase.
The major problem was again the dimensions of the feet, that was what I have to work with, no more, no less.
I ripped apart a monster from metal house ( I believe it was MUMMY )
that wheelbase with mechanism fitted exactly in the roboter feet. The wheels had the double width according the the sparky wheels but more important, they had a bigger wheelbase that gave more stability. I made a third prototype with this new feet and was finally able to have a walking roboter that could stand up by himself and… more important, was able to walk by himself without falling.
I started to alter this third prototype again and started to work on the arm movement. The only way i could have them going is the same as for many robots and I looked more close to an attacking martian, the mother of all robots. THe arms are driven directly by the movement of the feet. The arms can be moved also forward or backwards without breaking the mechanism inside. I designed a structure for the arms with a spring inside that allows the arms to move with the feet but so that they can also be set manually without breaking this inside the mechanism. Also that worked fine at the first attempt.
3D printed parts are very light and strong and an arm only weights about 28 grams but it changed the balance of the robot again when they moved so I had again… to redesign the rods inside the legs to find the exact balance again..
It was the final step though and again, I started to build up a complete new robot and used all the things I learned in the previous ones. This was the final step and finally i had all the settings i needed to build up a complete working Roboter 703-D.
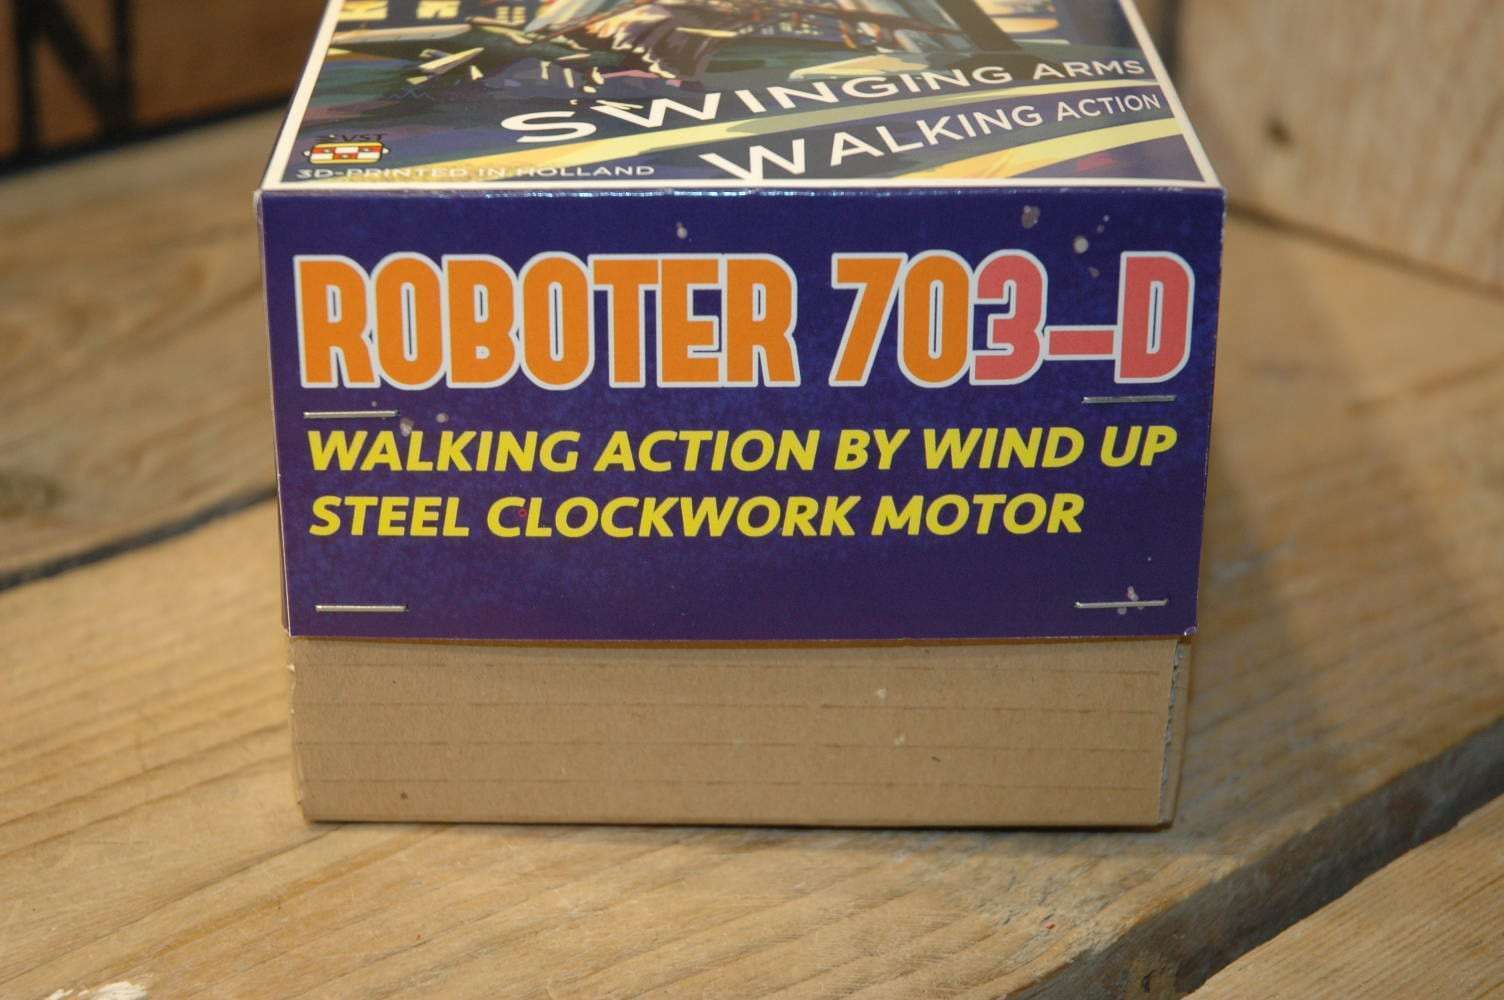
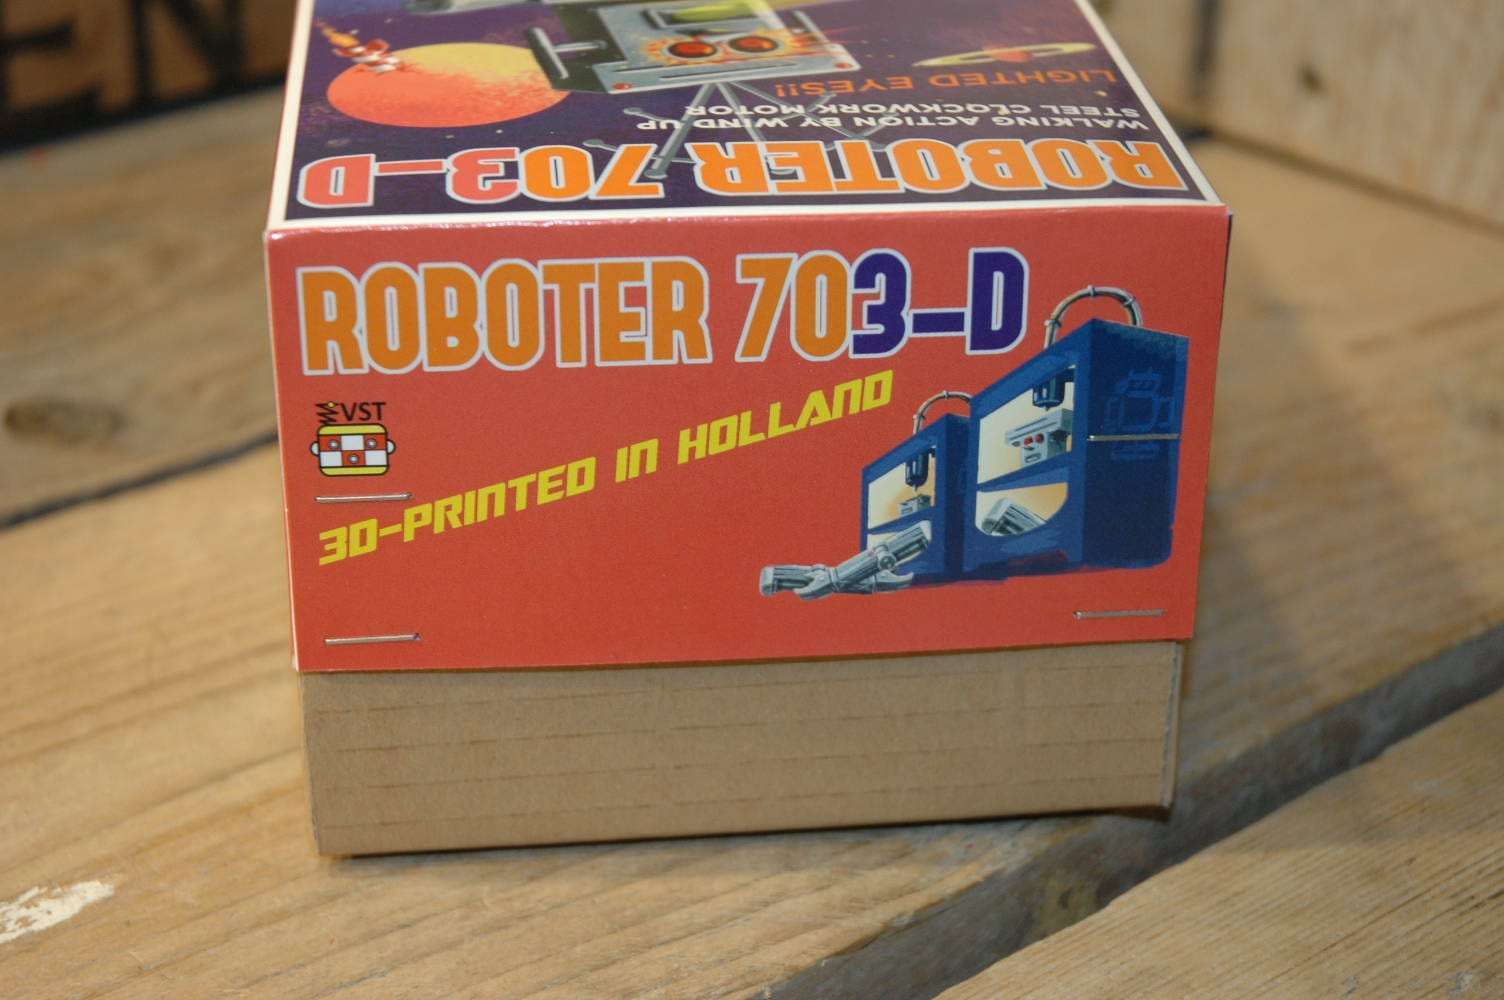
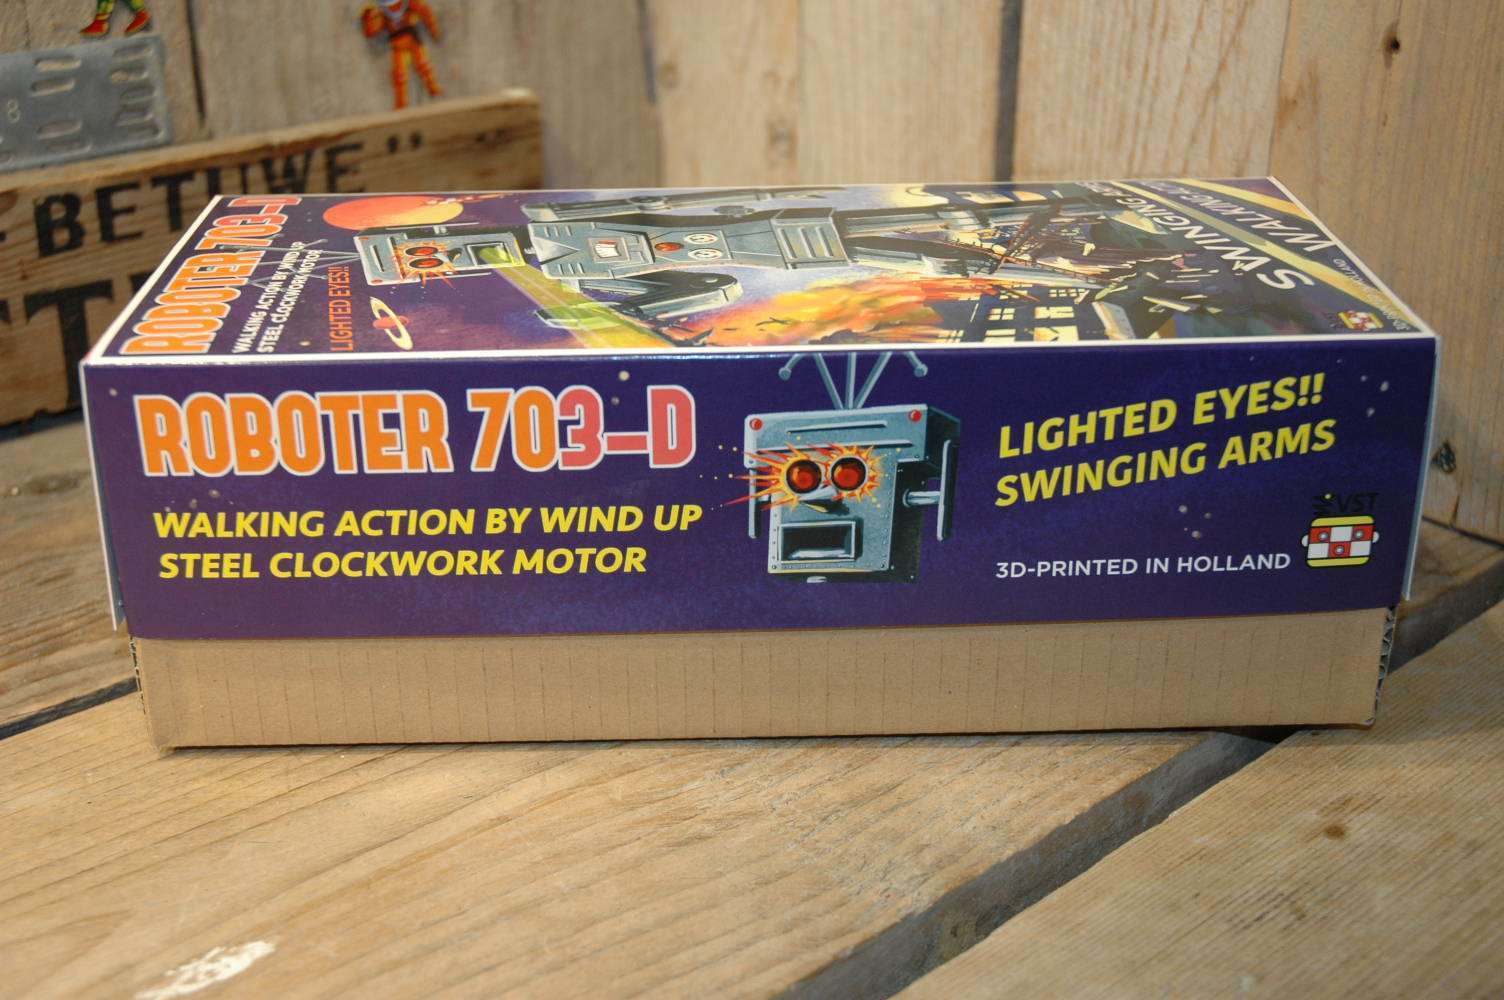
In the meantime. throughout the weeks i was searching and building, I talked with Nop Mercx about the artwork for the box for this project. I wanted to make it special and we talked a lot about the setting to use for the artwork. Nop was also responsible for the artwork for Changeman and Radar Master and really did a fantastic job on the artwork for the Roboter 703-D box.. It shows the “Evil” Roboter 703-D ( Not the “friendly” 700 anymore 🙂 Destroying everything that comes in his path !… Thanks Nop for all the time working with me on this artwork !
Some Technical and usefull information about Roboter 703-D:
* The body parts are printed on 3 Ulitmaker`s 2+ at high resolution.
* Material: PLA ( plastic ) (Metallic Silver )
* Total printing time: 62 hours
* Mechanism: Clockwork.
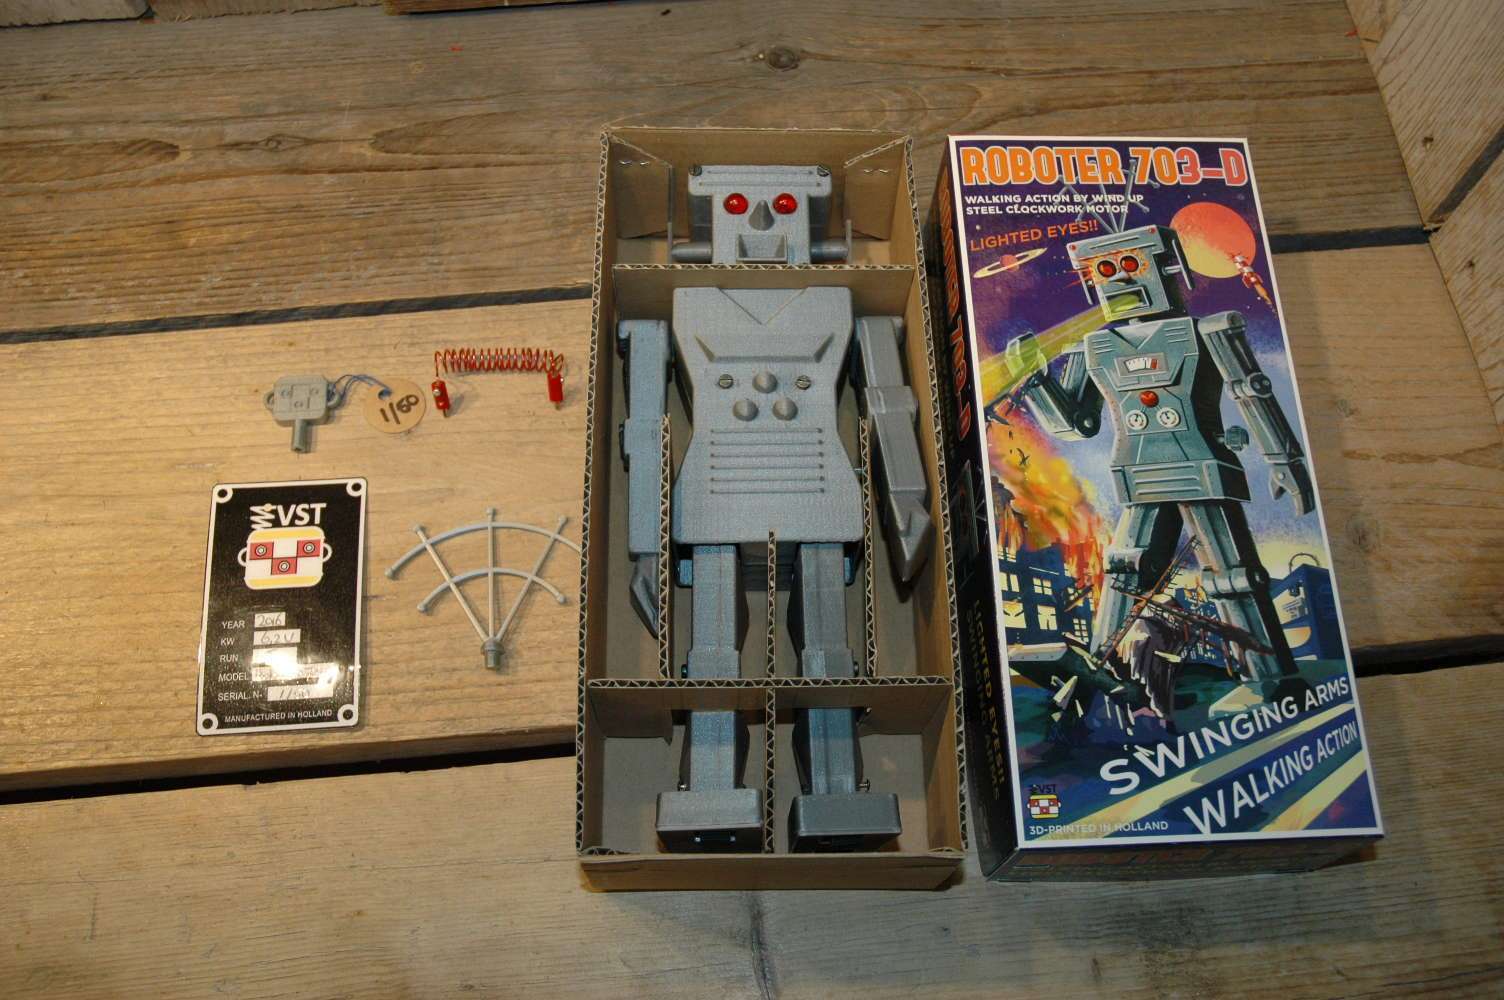
* Build together out of 117 individual parts
* Internal 6,2 Volt Battery ( can be replaced , 2 screws body front panel )
* 2 Vintage 2,5 volt bulbs for the eyes
* 2 smd card for blinking action ( installed in the head )
* 14 special screws.
* Actions: Walking forward, Swinging arms and blinking eyes.
* Instruction Manual.
* Unique ID card and costumm made Roboter 703-D box.
* Special designed Windup Key.
* Buildingtime: aprox. 1 week.
* Optional: Professional copy of the original Roboter 700 box. (125 USD )
A short video of this robot in action can be found: HERE
This Roboter 703-D will be made in a limited run of 50 exclusive examples. Shown in the pictures is serial #1 / 50
Price: 1475 USD excl Shipping.
For more information, contact me on: boogo.nl@gmail.com
Marco